What is a Rule in Lotus Notes?
A Mail rule is used to manage the incoming email messages in Lotus Notes. If any user wants to forward or delete email messages from a particular person then he can use this feature of the application. It can basically serve the importance of the emails to be viewed. With the help of mail rules in lotus notes 9, one can set the priority of the emails so as when any user opens the application, he/she can view the emails as per the importance of the email message.
How to create Mail Rules in Lotus Notes 9?
Below are the following steps to create Quick Rules in IBM Notes 9:
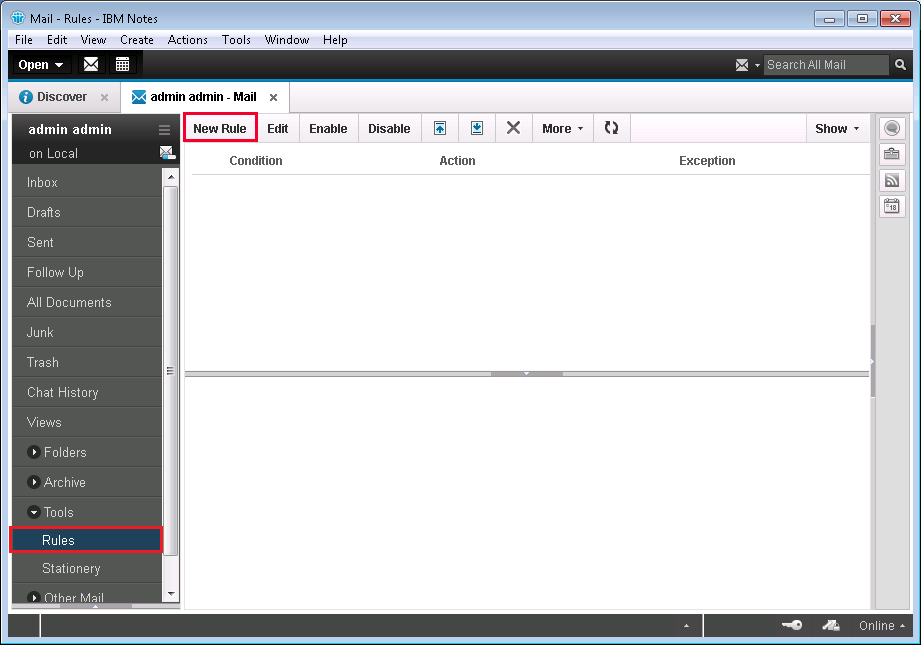
- Launch IBM Lotus Notes and open your mailbox. Now, click on Rules from the left pane of the window and then click on New Rule.
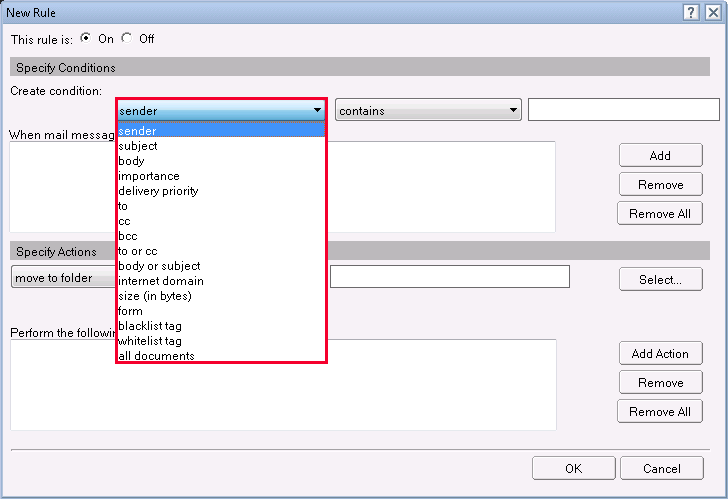
- A New Rule window will open. You can create a rule by setting up conditions. There are three fields or drop down available. In the first field, there are many options given in this field to set up the condition. Few are listed:
- Sender: Select the name of the person from whom you want to receive the emails.
- Subject: Filter emails by the Subject name like Repairing Tools.
- Body: Filter emails by a certain word or any phrase from the body of the message.
- Importance: Choose the importance of the emails and then you need to set another attribute i.e. the priority of the importance by choosing high/medium/low.
- Delivery Priority: Select Priority based emails with their three levels: high, medium and low.
- To: In the message’s To field, select the email message by the name of the person or persons.
- CC: In the message’s cc field, select the email messages by the name of the person or persons.
- BCC: In the message’s bcc field, select the email messages by the name of the person or persons.
- To or CC: In the message’s To or cc field, select the email messages by the name of the person or persons.
- Body or Subject: Enter criteria that Notes will look for in both the subject and body of messages.
- Internet Domain: Filter emails from the specific domain.
- Size: Get emails of a particular size.
- All documents: Apply the Rule for all emails.
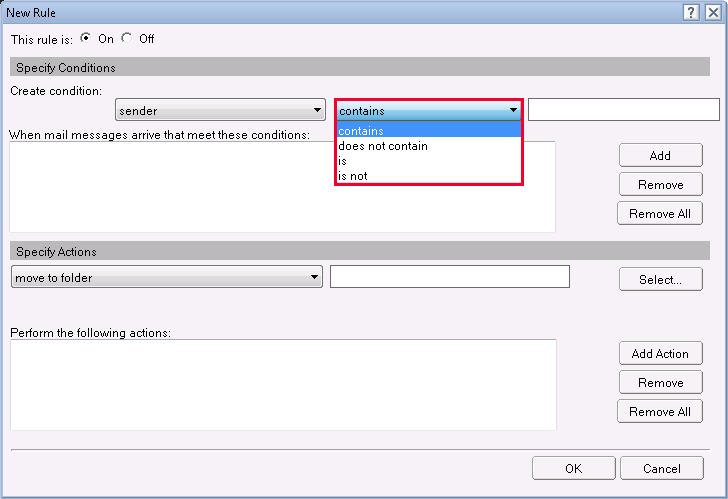
- In the second field, you can choose the given options for the comparison purpose. All the fields are inter-related and you just have to choose accordingly.
- Contains: The term that is entered by you in the third field can be visible anywhere in the field that you have selected in the first field.
- Does not contain: It means that anything you chose in the first field cannot include in the third field.
- Is: It means whatever is chosen by you in the first field that must be exactly the same entered in the third field.
- Is not: It means that anything you chose in the first field cannot be the option you entered in the third field.
- In the third field, type the name, email address, subject, etc according to the first field you have chosen in the previous steps.
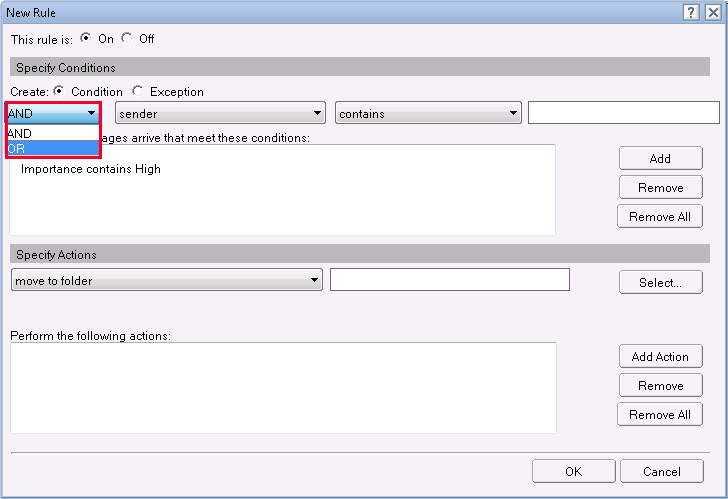
- There is another field that can be used in case if you have two or more conditions to be applied to the rule. There are two options in this field:
- AND: It is used to combine two or more conditions in such a way that if both the conditions are satisfied then only the rule is applied else not.
- OR: It is used to combine two or more conditions in such a way that if any one condition is satisfied then a rule can be applied to the mail.
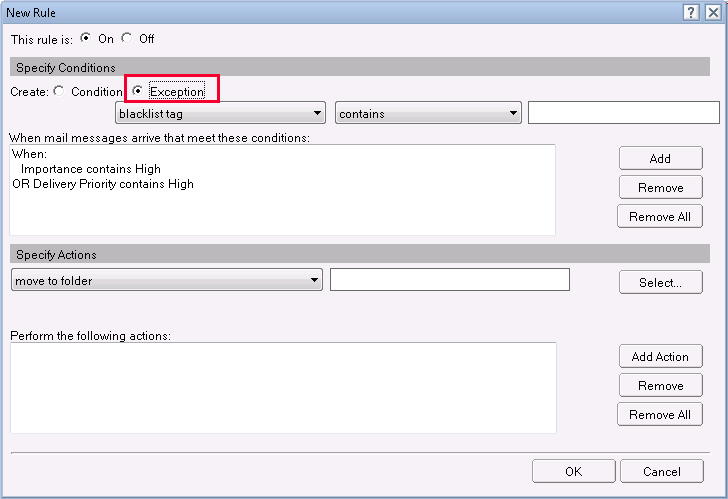
- You can also create exceptions with the help of Exception radio button in the rule in case of two or more conditions.
- Click on Add button to add the conditions in the Lotus Notes mail rules. All the constraints will be added in the box appearing to the left of the button.
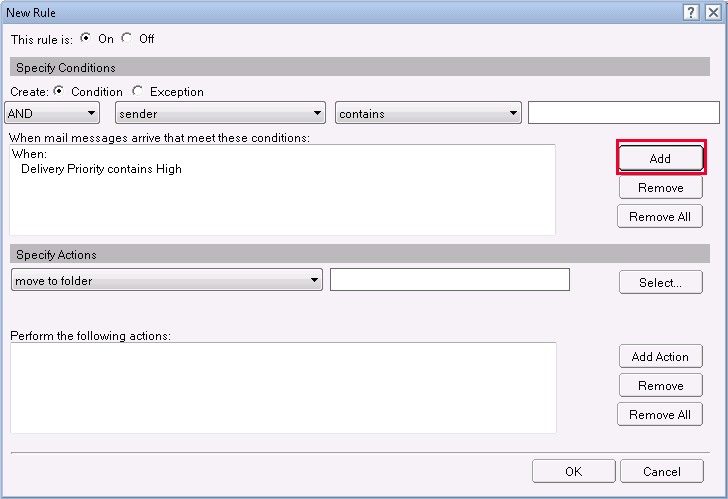
-
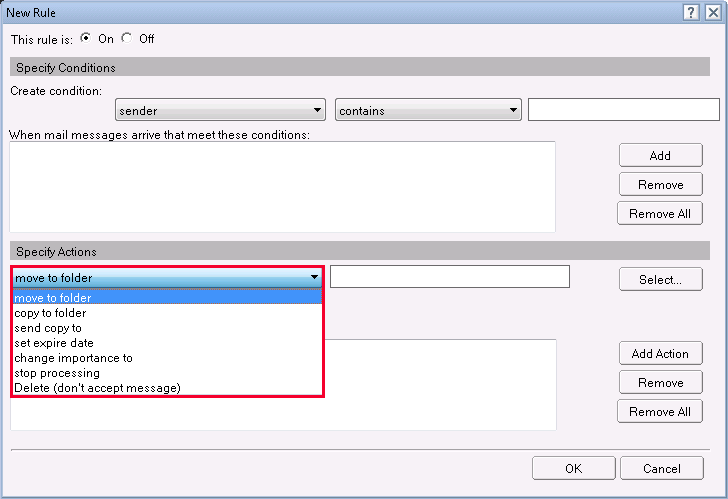
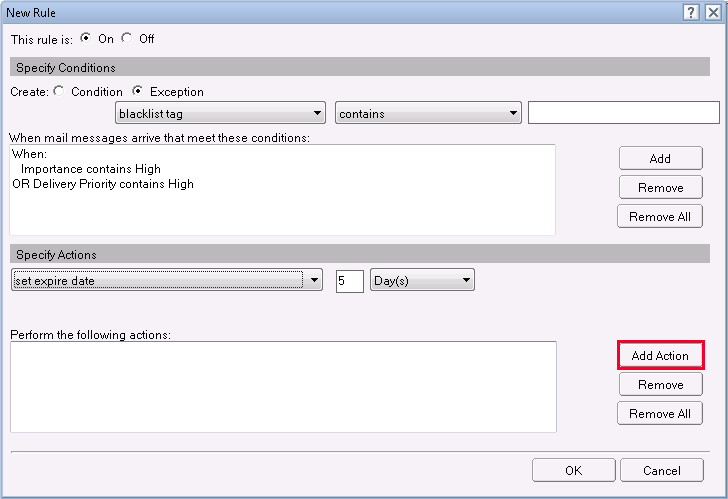
Now you need to set certain Rule Actions for the email messages. There are various options as mentioned:
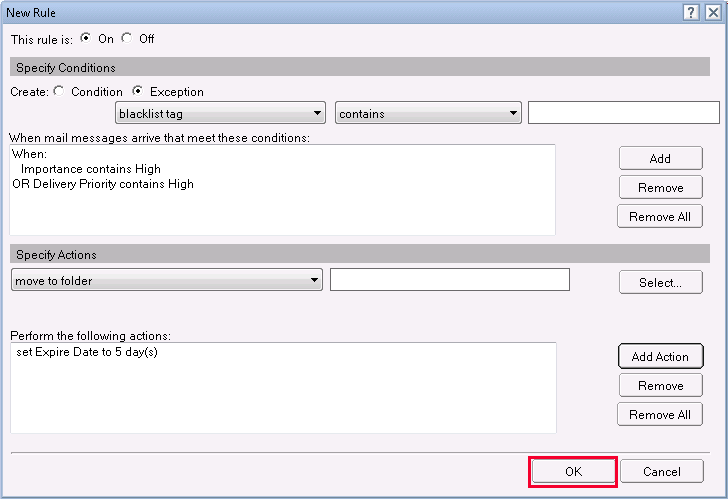
- Move to folder: Move all the filtered emails to the folder.
- Copy to folder: Copies all the selected email messages into a certain folder.
- Send copy to: Forward the emails to someone you have chosen automatically.
- Set expire date: Automatically deletes the email message after the marked expiry date.
- Change importance to: Change the importance of the message.
- Delete: Remove the message.
- Click on Add Action button to add the action applied to the conditions mail rules in Lotus Notes.
- After adding all the conditions and actions in Lotus Notes Rule. Click on OK button.
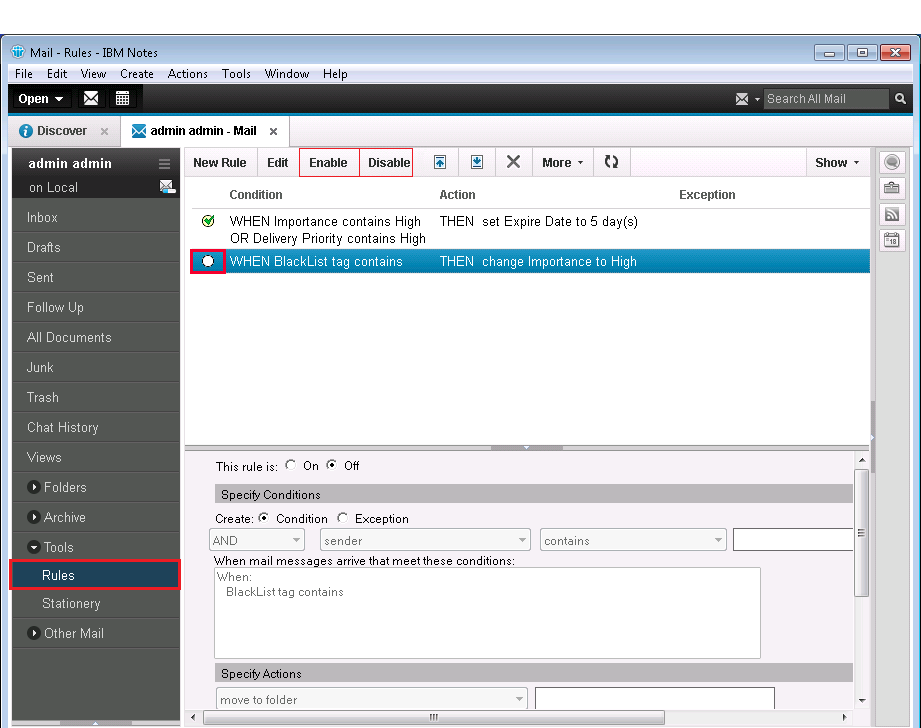
- A new rule is created. You can view it by clicking on Rules in the left panel of the window.

How to Enable/Disable rules in Lotus Notes?
If you have set any rule in the email application, then you can see that the enabled rule is checked. It is possible to apply the rule as per user’s wish. So, at that certain period of time, one can disable the rule in Lotus Notes 9. To do so, open the mailbox, click on Rules from the left pane of the window and click on the rule which you like to Enable/Disable and then click on Enable/Disable button as shown. There is another method. You can right click on the mail rule and then click on Enable/Disable. After that, the specific mail rule will be visible as unchecked.
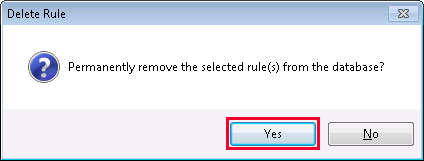
How to Delete Rules in Lotus Notes?
If a user does not need the mail rule in his email application then he can delete the rule also. You just need to right-click the rule and then click on Delete button. A dialog box appears and then click on Yes button.
Last Words
In this article, we have discussed mail rules in Lotus Notes. All the conditions that can be applied to the email messages are defined. With the help of the following steps, you can create, disable and delete the rules in IBM Lotus Notes email application. With Export Notes Tool easily switch to other emails clients.